|
Once the FinalBuilder project file has been uploaded to the build server you can add a new FinalBuilder Server project which uses that project file.
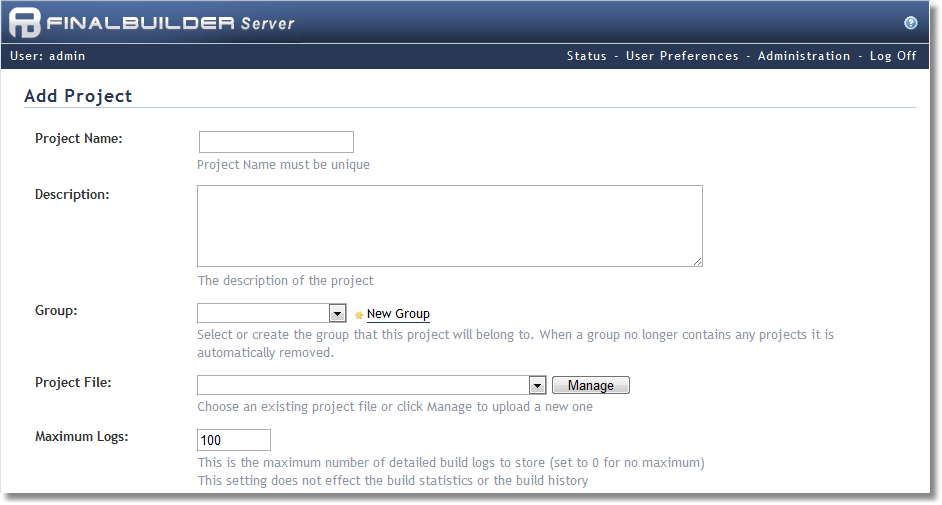
| 1. | From the FinalBuilder Server Status page click on the 'Add New Project' link located towards the bottom of the content. |
| 2. | Choose a project name which will be used to identify the project throughout the server. |
| 3. | Optionally give the project a description, the description can be anything (i.e. explains what the project builds, or it might contain the maintainer of the project). |
| 5. | Select whether you want the project to be made public. When a project is public, all users including anonymous users can view the project, but only logged in users may interact with the project. A private project is only visible to users who are logged in and have access to it. |
| 6. | Depending on whether or not you have a global impersonation user you may need to provide the windows username and password who will be used to execute the build. |
| 7. | Clicking 'Add' will add the project to the server and you will be redirected back to the status page after clicking 'Save'. |
Note: you can have multiple projects defined which use the same physical project file. Each project can be configured with different variables, different triggers, etc.
|